

Installation
Step-by-step installation guide for your SparkBadge LED kit.
Follow this guide to install your LED badge safely and correctly. The steps are simple and designed for beginners. No advanced skills required.
Interactive guide
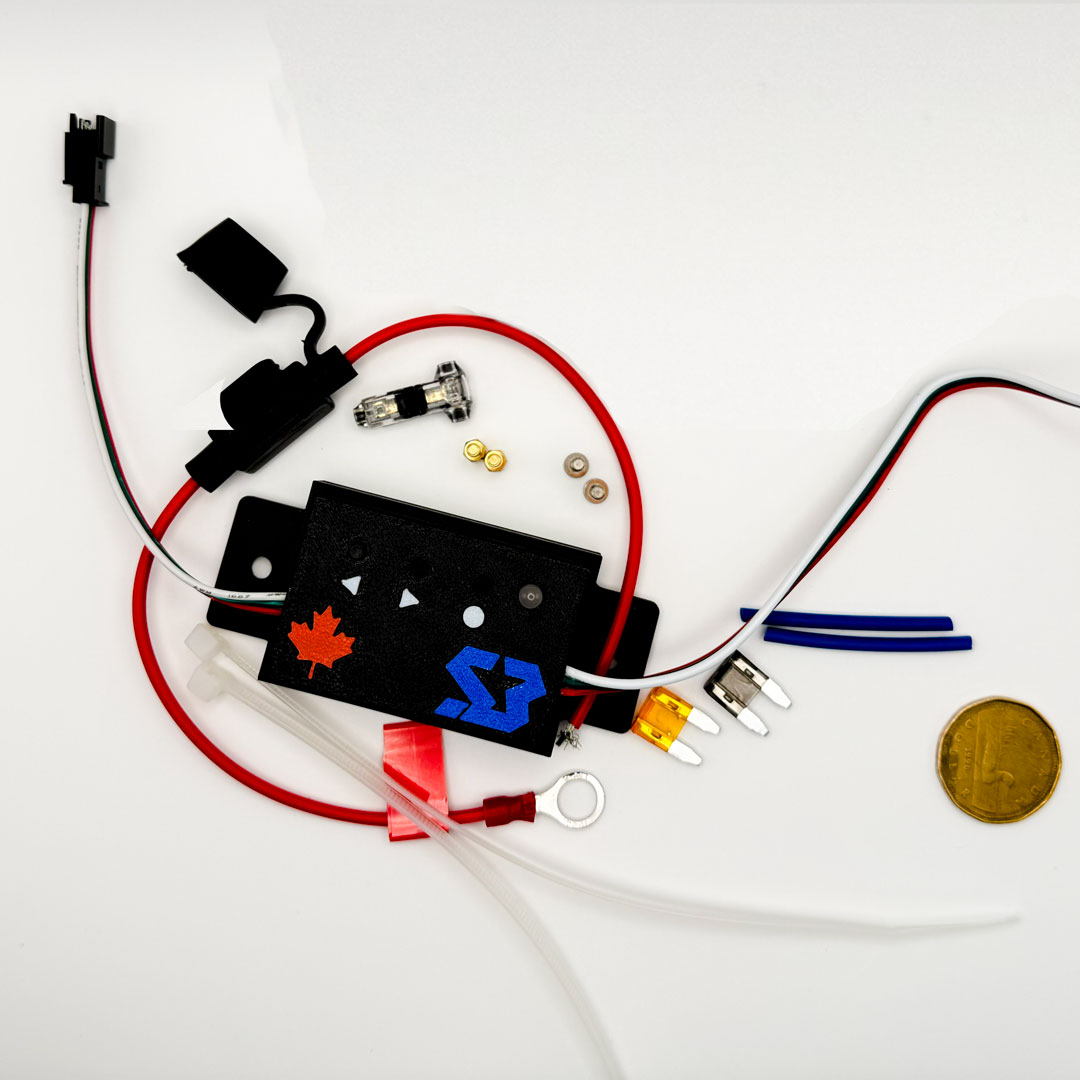
Unbox and inspect components
Check all parts before starting to make sure nothing is missing or damaged.
- Lay out all components on a clean surface.
- Compare items with the box contents list.
- Inspect badge, wires, and controller for damage.
Step images
Step videos
No step-specific video linked yet for this stage.
Safety and support
- 12V automotive systems only.
- Disconnect battery before permanent wiring.
- Always connect ground directly to the battery negative terminal.
- Do not connect the badge directly to power without the controller.
- Using a headlight signal wire is strongly recommended.
What’s in the box
- 1 x LED badge (lighting unit)
- 1 x Bluetooth controller
- 1 x Inline fuse holder harness (14AWG)
- 1 x T-Tap connector
- 2 x Heat shrink tubes
- 2 x Zip ties
- 1 x 3A fuse
- 1 x 5A fuse
- 2 x M3 mounting screws
- 2 x Brass mounting extensions